How to Use Image Frames in Canva
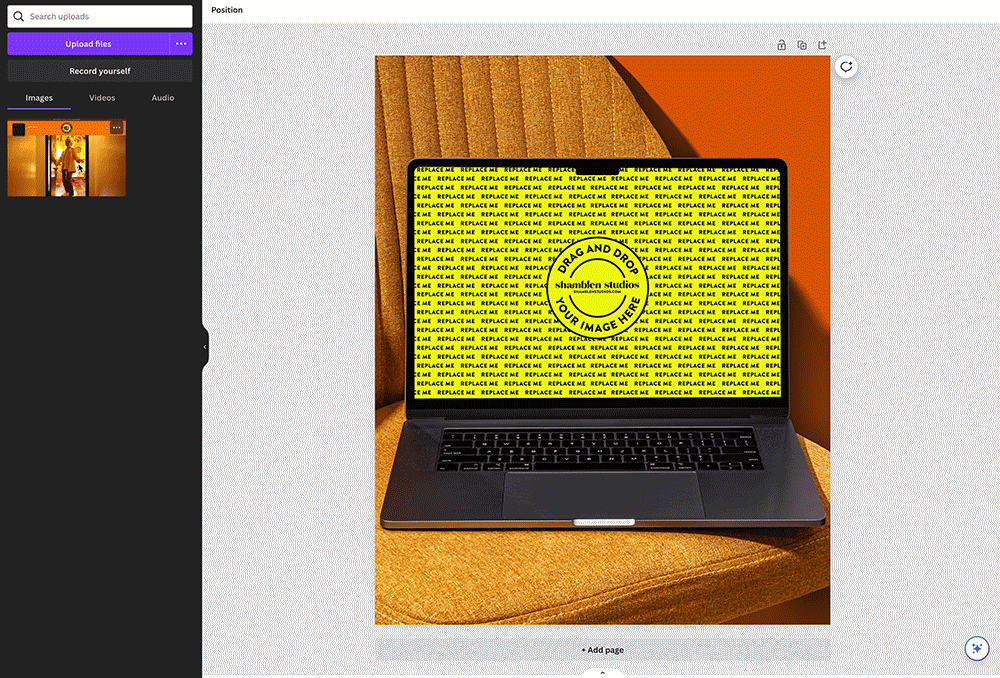
Whenever you see a Shamblen Studios image mockup with the brightly colored frame (like the image below), that’s when you know it’s an editable image frame!
If you’re unsure how to use these frames while working in Canva, read on to find out how!

What I love most about creating these custom frames is that it allows you to put in any image you want! Whether you:
Have a client website to show off
Want to share a screenshot of an awesome testimonial you just received, or
Need showcase your work in a professional way
These are perfect for just that—and more! And the best part is that I’ve already done the work of creating the custom frame, so all you have to do is drop your image in. So, let’s dive in, shall we?
First, upload your drop-in image to Canva
To do this, go to the sidebar (or bottom bar on mobile) where it says “Uploads” and click the purple “Upload files” button. Or, you can simply drag and drop your image onto that panel to upload it.


Next, drag your image onto the frame
This is where the magic happens, and it’s SO easy! Take that image you just uploaded and drag it over that colorful image frame you see above.
On mobile, simply tap the frame and hit the “Replace” button at the bottom.
And voilà! That’s all there is to it. Now, go crazy with customizing your image frames! And if you need more mockups like this, check out the membership for unlimited access!
XOXO,

